Postingan

Menampilkan postingan dari Agustus, 2018

Keep A Backup Copy Of Complicated Gadget Settings

Gambar
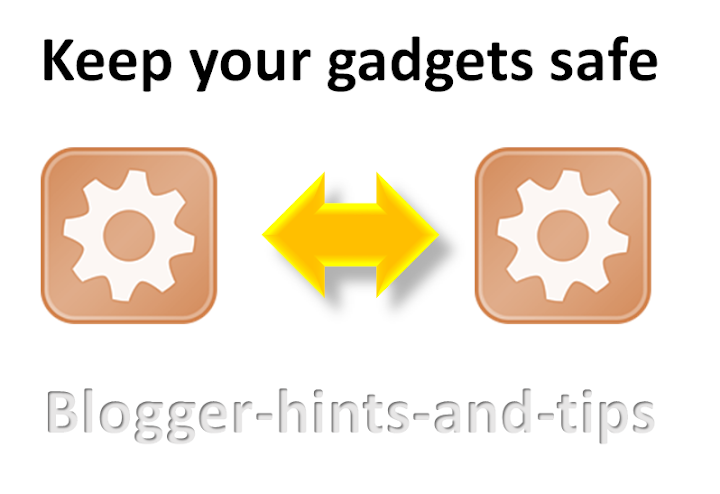
This article explains why it's a good idea to keep a backup copy of settings for your gadget, in particular for HTML/Javascript gadgets that have complicated, hard-to-regenerate, code. Blogger's backup tools let you take copies of: your post-contents and (separately)  your template.  Some 3rd party backup tools (eg HTTRack) let you make backup copies of how your blog looks - including the consequences of displaying your gadgets. But as far as i know, there is no way that you can back up the settings (ie parameters or configuration) that are stored inside the widgets on your blog. This can be a duduk masalah if you accidentally remove a gadget, or if you have an HTML gadget and get the code wrong in it: Blogger is quite unforgiving sometimes, and the HTML/Javascript gadget editor simply removes any code that it doesn't understand. In some cases, this isn't not a big duduk masalah  eg if you show a picture as a gadget , then it's generally easy

Adding An Rss Feed Icon To Your Blog, Using Feedburner

Gambar
Feedburner's chicklets are used to add the standard "orange radar" button to your blog.  This lets readers to subscribe the RSS feed of your choice.   The information is targeted to Blogger users, but most of it applies to anyone who uses Feedburner. What is a Chicklet, and why you need one: Previously I've explained how to remove the (ugly and confusing) "Subscribe to Posts (atom)" link from your blog , and why RSS / Subscribe to Posts is important to your blog and how to create a Feedburner feed for it . But an RSS feed is useless unless people subscribe to it.  So as well as making the feed, you also need to put something in your blog that lets your readers sign up for it . A standard option for this is the orange square with "radar" markings on it, which many people call a " chicklet " (since it lets your viewer - the chicken? - have access to the feed you are providing). Feedburner also has options for: Using a cus

Help Visitors Who Arrive At Your Blog Via A Link To A Deleted Post

Gambar
If you sometimes delete posts from your blog, then it's a good idea to provide some help to people who who arrive at your blog via links to those posts. (Even if you don't have any links to those posts, it's likely that a search-engine somewhere will have some - and other people may have bookmarked or shared them, too.) There are two options for doing this: Post-specific redirects Use these if you want to re-direct visitors who come to a particular previous post: Go into Settings > Search Preferences , click Edit beside Custom Redirects . Click  New Redirect , to create instructions for what to do if a visitor tries to navigate to a specific post. Put the address of the post that you want to make a re-direct for into the From field. Put the address of the post that you want to visitors to be taken to into the To field. For both addresses, the part you need to enter is the URL of the post from the first backslash on.   Do not put in your blog-a

Look At The Receipients Of The Registration Will Renew Automatically In X Days Email To Work Out Your Domain-Administration Login Name

Gambar
This article is about how you can work out what Google Account to use to check custom domain renewal details from the reminder emails that Google sends in the month before the domain registration expires. Domain registration warning emails If you have a custom domain that you purchased through Blogger (when that service was available), and you have not transferred that registration to another domain registrar, then every year you will get a series of email messages like this: The message text is: Hello, Your domain name, yourDomain.com, is configured for automatic renewal with registrar REGISTRAR (usually enom or goDaddy) on DATE. Each registration renewal is valid for one year. Google will charge your account after the renewal is complete. To ensure uninterrupted service, please follow these directions to update your payment method if needed. If you don’t want to renew your domain name and continue using Google Apps, you should turn off automatic renewal u

Non-Us Based Amazon Associates Must Perform All Services Outside The Us

Gambar
An interesting addition to Amazon's terms and conditions for their Associates (announced here ): “If you are a Non-US person participating in the Program, you agree that you will perform all services under the Operating Agreement outside the United States. If, for any reason, you cannot comply with this requirement, you must notify us using this link for an exception.” My guess is that this is something to do with tax-regulations, and is worth a few moments thought (at least) for Bloggers who use Amazon Associates links  to earn money from their blogs.     But it also made me wonder about bloggers who travel a lot:   we possibly shouldn't be doing any work inside a country where we don't have a visa that allows us to work.   I wonder if that includes writing blog posts, or perhaps even drafting but not publishing them or taking pictures for them? 

Adsense, Mobile Templates And Analytics - And How They Do (Or Don't) Work Together

Gambar
If you use AdSense to make money on your blog, and have a mobile template enabled (which should, unless the blog is about something that makes no sense on a mobile device),  then it's an extremely good idea to have at least one AdSense ad-unit that was made with Blogger's official AdSense widget rather than by getting the code from AdSense and installing it manually. This is because the a majority of gadgets don't show up on the screen when a visitor using a mobile device (cellphone or tablet) looks at a blog which has a mobile template set up for it - and by default this includes AdSense gadgets.   When a mobile visitor looks at a blog, Blogger does check to see if AdSense is used on it, and if so it shows one or two ad-units to them.  But unfortunately these checks only detect AdSense gadgets, not AdSense code in HTML/Javascript gadgets or added directly to the template.   So the net effect is that unless you have one of the official AdSense gadgets, mob

Giving Your Blog A Home Page

Gambar
This article is about the options for setting the home page for blogs made with Google's Blogger. Blogs don't have a "home page", main page or "landing page" in the same way that regular web-sites do.  Instead, they show the newest post first, since (hopefully!) most readers will be return visitors, coming back to see what's new. But there may be blogs/websites where you want a welcome message or a particular post to appear first whenever someone visits your blog, or where you want to put all your posts in reverse order. This article is about options for giving your Blogger blog a "home page". It lists four options, and gives advantages/disadvantages of each approach, and links to articles with details about implementing each case. If you can think of any more approaches, please leave a comment below. Options for giving your blog a home page include: Static page combined with a custom re-direct - as discovered by Nitecruz

How To Take Better Pictures - No Matter What Sort Of Camera You Have

Gambar
This weekly blogger tip is complements of Shutterfly:   tips about how to take great photos, of various types, no matter what sort of camera you use. Why? Why take your own pictures, when there are so many free-photo-search tools out there? Well, if you want your blog to be copyright-legal , then you need to either find free-use photos, or make your own. Creating your own post-photos is especially useful to prove that your local blog really is local (like thumbnail image . How? Great tips from the pros, here: http://www.shutterfly.com/how-to-take-the-perfect-photo/ The best bit is that this isn't just a glossy, or a snobby "fancy-cameras-only" guide.    There are tips for every combination of  camera type: DSLR Smartphone Point and shoot and photo type: Portraits Selfie Bokeh Macro Action shots Close up Wide angle Food Candid By the water Landscape Panorama PS Shutterfly said "Please share this interactive on your site or blog

How To Add A Badge To A Blog Made With Blogger

Gambar
This article is about how to add a badge that someone else gives you to a blog made with Blogger. Sometimes, blog-owners run a blog-a-thon or a similar circle-of-blogs event. One aspect of taking part is by showing a badge for the event on your own blog , so that your visitors are invited to take part and to view other participants' blogs too. Usually who-ever is hosting the event gives you the code for the badge, and tells you to install it into your own blog.   Sometimes they even tell you how to install it to your Wordpress blog - like this . Fortunately, installing a badge to a blog made with Blogger is equally easy. Installing a badge to Blogger Decide where you want to put the badge.   Traditionally badges go into the sidebar, but you could choose to put it into the header or footer, into the space above or below your posts, or even into an individual post. Get the">How to make a Button for your Own Blog .   But 99.99% of the time, they pr

Introducing The Free High-Quality Picture Search Tool

Gambar
This article introduces the Free High Quality Picture Search tool which has been added to this website . Today I've added a new feature to . The Free High Quality Image Search tool is available from the sajian bar. It is a tool to help you locate free, high-quality pictures to use in your blog posts or other website projects. It is based on a Google-custom-search engine , and a carefully selected set of websites that offer images you can use for free on your blog, even if it is "commercial" (ie you have advertising or any other way of making money from it). The difference between this and the images that you can get from a general-purpose search using the Creative Commons image and multi-media search tool is the resolution of the images that are found and/or their photographic quality. How to use the Free-image-search tool Choose it from the sajian kafe on this blog, or navigate directly to it at   http://blogger-hints-and-tips.blogspot.ie/p/free-

How To Copy And Paste A Website Address On An Android Smartphone

Gambar
This article explains how to copy and paste a website address (URL) when you are using the Chrome browser on an Android smartphone. Copy and paste on an Android phone When you are using an Android cellphone, the usual way to copy-and-paste text is to "long-click" on one word, and after it is selected, drag the selector-bars at either end to select more of the text. After this, you have options on a list at the very top of the screen to cut, copy and page. But this doesn't work on the Chrome browser's address-bar, ie the place where you type in website addresses, or see the address which your currently viewed pages has. Here, there is no long-click, and you have to use a slightly different approach. How to copy a web-address on a Smartphone using Google Android and Chrome 1 Inside Chrome, go to the website and page that you want to copy the address from. 2 From the top right handcorner, choose the Overflow sajian button: this is three vertic

How To Add A Google Contacts Button To Your Blog, Website Or Desktop

Gambar
This article shows how to add a button that takes a user straight to Google Contacts to your blog or website.   It also distributes a picture that you can use in other places (eg your PC desktop) to make your own Google Contacts icon. Most people have a button on their computer or smartphone, which they use to start their email.  For some, this goes straight to their Gmail account in a web-browser, while others use an system like Thunderbird or Outlook to look at their email messages in a Gmail account and/or in email accounts they have with other services. If you use Gmail as your email system, then Google also gives you an address book, which they call Contacts. This is not the same as the address book in Thunderbird or Outlook etc, which is saved on your local computer.   Instead, the Google address book is saved on the internet, in your Google account. Google Contacts is tightly linked to your Gmail account, and the way that most people access it is by: Going t

Find Things In Your Blog-Posts' Html By Using Temporary Marker Text

Gambar
This article shows how to use "marker text" to help find things when you need to edit the HTML code behind one of your blog posts. When you edit a post in Blogger, to start with you generally use the Compose mode, which shows you the formatted view of how your work will look. But behind that formatted view, every post is actually written in HTM L, ie Hyper-text Markup Language - a type of computer language that uses tags like <h2> or <a href="www.foo.com">  to say how to display the contents. A number of articles, here and in other blogger-helper blogs  tell you how to do thing by changing the HTML for the post. But if you are not used to working with HTML, it can be confusing tryign to fix the part that you need to change. Marker-text is a technique that you can use to "mark" persoalan areas while you are still in Compose mode, so that you can easily find them again when you are in Edit HTML mode. How to use marker-text to fi